1260 Memorial Drive
Atlanta, Georgia 30316
404-458-1330
DIY Bob Life: Our Top 4 Bob Hairstyles You Can Do at Home!
Mikey MoranNow that the snow is gone (for the most part) and we can start pulling the sundresses back out, its time to change up our hair too.
The constant craze for summer will forever be the bob, and they're nothing like the ones our moms use to wear.🤶🏿
Celebrities have made sharp lines, thick bangs, and layers the staples for selfie-worthy hair and I have the how-to on four selfie-worthy bob wig styles.
Let's get into the different types of bob haircuts that might end up being your next hairstyle.

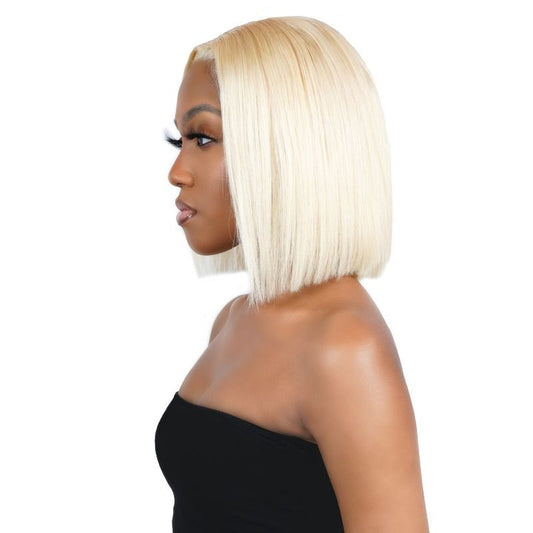
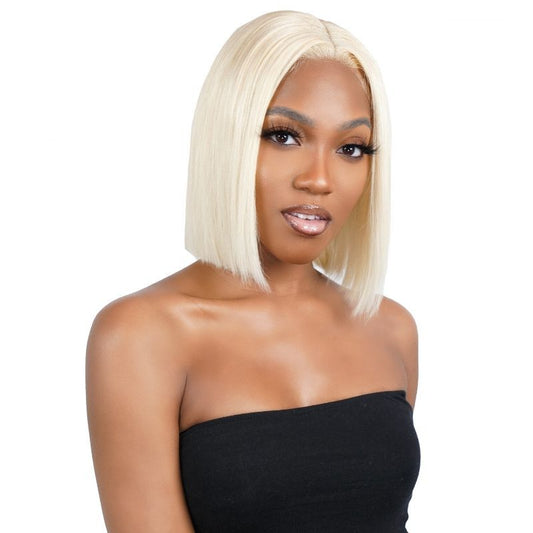
Sleek Blunt Cut Bob
The blunt cut bob style made its mark amongst us girls in the last year.
We all thought that only celebrities could achieve this flawlessly horizontally cut style, but the secret is out!
I've got step-by-step instructions on how to achieve the most even and sleek cut possible as if you had gone to a professional.
Before you begin cutting here are a few things to keep in mind.
Determine how you plan to style your blunt cut bob. Are you creating a bob with your natural hair, bob wig, or wearing virgin hair extensions?
If you only plan to wear it straight go for whatever length you like. If you plan to curl it, leave a little extra length, so your cut doesn’t look super short after styling.
When installing your hair try to put less hair in the nape.
A blunt cut gives the illusion of thickness, so there’s no need to have the weft stacked on top of one another in the back.
Tools:
- Shears
- Clippers (no guard)
- Comb
Now here are the steps to achieving a flawless cut:
Step #1
Decide the length of your desired cut
Step #2
Grab your clippers and hold them vertically
Step #3
Give yourself some grace room and move the cut down two inches
Step #4
Place your clippers on the back center of your bob
Step #5
When cutting, pivot the clippers between your index finger and thumb to get a crisp horizontal line
Step #6
Work to the left of your center cut using the center as your guide
Step #7
Let the clippers do all the work
Step #8
Don’t add any tension to the hair with your hands
Step #9
Next work to the right of your center cut using the center as a guide
Step #10
Work your comb through your newly formed bob
Step #11
Use your scissors to cut any stray hairs
That’s it! Your blunt cut bob is complete!
Now you can use a flatiron or curling wand to throw in some waves or leave it as is. Do you have a trendy way to style your blunt cut bob?
Let me know down in the comments below!

Layered Bob
It's just like a regular bob, only the shape in the back allows you to create a body and a new shape.
If you are layering a closure bob wig, we suggest purchasing a 12" or 14" length to ensure you have enough length to cut for the layers.
- Start with wet hair and pull it straight back into a tight ponytail. The higher your ponytail, the more layers you will have.
- I prefer to place my ponytail in line with my ears. Pull the ponytail out away from your head to the desired length.
- (If you want a very short wedge, and don't pull it out at all, this method will probably not work for you. It will cut too much off.)
- Now cut off all the excess hair outside the ponytail with your clippers. Cut straight down so the layers will be even. Pull the holder out and admire your work so far.
- At this point, you can cut your hair shorter if you’d like. To test your layers take a curling wand and curl a few sections in the back.
- The curls should sit on top of one another and create a smooth transition.
If your curls happen to intertwine and lack a layering effect, go back with the razor comb to add deeper layers.

A-Line Bob
The A-Line bob is a funky twist on the classic with its high cut back and long front. Rihanna wore it memorably through her “good girl gone bad” phase.
Tools:
- Clips
- Scissors
- Comb
Step #1
Determine which side your bang will be on and place your part in the desired position
Step #2
Make a horseshoe-shaped section from behind both ears through the crown (section 1)
Step #3
Clip that section away
Step #4
Then create a second horseshoe-shaped section right above that, from the top of one ear to the other (section 2)
Step #5
Clip that section away
Step #6
Clip the two rectangular sections on either side of the part away (section 3, section 4)
Step #7
Release the lower section and comb it out, also use your comb to keep your guide section in order
Step #8
Begin cutting in the center with a horizontal cut
Step #9
Work to the left first, cutting at a slight angle as you go
Step #10
Comb down the uncut hair as you cut to get a smooth transition
Step #11
Repeat steps 9 and 10
Step #12
Release section 2 and cut it according to section 1. At this point, section 1 is serving as a guide for the rest of the cut
Step #13
The ends will fall alongside section 1 so cut them following the slope of that section
Step #14
Release sections 3 and 4 and comb them out
Step #15
Cut them the same way you cut sections 1 and 2
Step #16
Be careful not to change the angle of your scissors too much as you cut
Step #17
Once you are finished use your scissors to cut away any stray hairs.

Heavy Bang Bob
Anthony Cuts makes bobs with a heavy bang look so fabulous, that may be why we are all flocking to this style. It’s a really fun and sexy way to play with a left or right part.
Another plus is the versatility.
No matter your face shape or head size a heavy bang will look great on you.
Also check the Honey Blonde Bob Wig with Bangs!
Tools:
- Straight razor
- Scrunchy
- Comb
Instructions:
Step #1
Part the hair the way it is normally worn
Step #2
On the side with the bang part of a rectangular section from the part to the top of the ear
Step #3
Take all of the excess hair and put it in a ponytail
Step #4
Comb the bang portion away from the face and between your index and middle fingers
Step #5
Make sure your fingers are pointing down, and your elbow is up
Step #6
Then rotate your hand clockwise so that your fingers point up and your elbow is down
Step #7
To cut place your razor at the midsection and gently glide it down the section behind your fingers
Step #8
Go back in with the blade for a more dramatic cut
Now you can use your flat iron to add wisps to your heavy bang for a sexy side sweeping effect.

5 Quick Tips for the Perfect Bob Hairstyle
Now that you have read about our favorite types of bob haircuts, we decided to end this article with tips on how to get the perfect bob hairstyle. Incorporate these quick hair tips for success with your next bob cut.
And, of course, leave us a comment below with any additional tips you want to share with the Private Label community.
1. Choose the Right Length
Face Shape Consideration: Select a bob length that flatters your face shape. For round faces, longer bobs (think about 14” if you are buying a bob wig) that fall below the chin work well, while shorter bobs (10” or so) can enhance angular features in square or heart-shaped faces. When in doubt, start with a 14” bob and have a hairstylist cut it to match your face.
Lifestyle and Maintenance: Consider your lifestyle and how much time you will spend on styling. A shorter bob requires more frequent trims to maintain its shape. Get a bob wig and easily switch up your hairstyles with different lengths and colors. We love this cherry bob wig as an example.
2. Precision Cutting
Sharp Tools: Use sharp, professional-grade scissors to achieve clean, precise lines. These sheers are crucial for a bob, as uneven or jagged edges can ruin the sleek look. If purchasing a wig, make sure it doesn’t have many short strands that will cause flyaways. You know that’s not something you need to worry about when purchasing from Private Label.
Sectioning: Divide the hair into small, manageable sections. These sections allow for more control and ensure an even cut throughout the hairstyle.
3. Layering and Texturizing
Add Layers: Incorporate subtle layers to add movement and volume to the bob. The layers prevent the hair from looking too heavy or flat, especially for those with thicker hair. We love layers!
Texturizing: If you desire a softer bob style, use texturizing shears to soften the ends and create a more natural, tousled look. Finding a pre-styled and textured wig is a quick solution.
4. Perfect the Blow-Dry
Use a Round Brush: Blow-dry the bob with a medium to large round brush, directing the hair under to create volume at the roots and a smooth, curved finish at the ends.
Heat Protection: Always apply a heat protectant spray before blow-drying to prevent damage and keep the hair looking healthy and shiny. Looking for a new brand to try? Private Label has a popular heat protectant spray that hairstylists have grown to love.
5. Finishing Touches
Smoothing Serum: Apply a small amount of smoothing serum or hair oil to tame any frizz and add shine. Focus on the mid-lengths and ends to avoid weighing down the roots. A hair wax stick should also be in your collection of hair styling products to keep all flyaways down.
Hold and Flexibility: Finish with a light-hold hairspray to keep the bob in place while maintaining natural movement. Avoid heavy sprays that can stiffen the hair. Think firm and flowy to match all types of bob haircuts.

DIY Like a Boss
"Doing it yourself" is almost always fun, but it's even better when you have a little help.
If you found this how-to useful let us know down in the comments. Come check out our bob collection at our Atlanta hair store and online at Private Label.
Also, tag us in your next DIY bob so we can see how they turned out. We love seeing your work!🥰🥰


3 comments
Great guide! I love the sleek blunt cut. Quick question: how do I prevent the hair from looking too thick at the ends when doing a blunt cut?
Great guide! I love the sleek blunt cut. Quick question: how do I prevent the hair from looking too thick at the ends when doing a blunt cut?
Wow, these DIY bob styles look amazing! I’m tempted to try the Sleek Blunt Cut first.