


1260 Memorial Drive
Atlanta, Georgia 30316
404-458-1330
How to Install an HD Lace Wig: A Step-by-Step Guide
Mikey MoranHD lace wigs significantly improved the wig world to another level, offering a nearly invisible hairline that blends seamlessly with your skin and hides in your scalp.

If this is your first time installing an HD lace wig, this guide will walk you through the step-by-step process of how to put it on so that it looks undetectable, so, you look like a diva with a voluminous hair.
If you prioritize looking gorgeous everything, you have to buy yourself one!
Keep reading for more to learn how to install a lace front wig.💪🏾

Understanding HD Lace Wigs
Before we dive into the installation process, let’s briefly discuss what makes HD lace wigs unique.
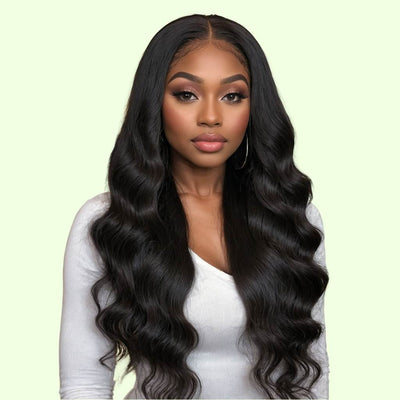
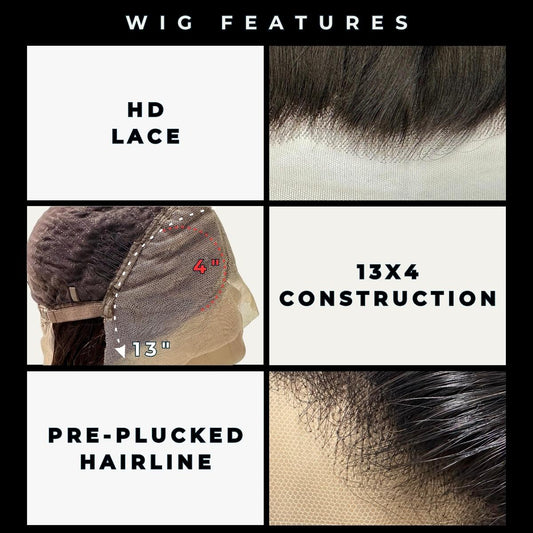
Beginning with HD lace Features, HD lace is short for high-definition lace, is an ultra-thin, transparent material that mimics the look of your natural scalp.
This innovative lace allows for a more natural-looking hairline and is incredibly breathable.

HD Closure Wigs vs. HD Lace Frontal Wigs
HD lace wigs are available in HD closure and HD lace frontal varieties.
HD Closure Wigs:
With this type of wig, the lace covers a smaller area, typically just the top or crown of the head. It usually comes in four sizes: 4×4, 5×5, 6×6, and 7×7 lace closures.
HD closure wigs usually also come with a part already made for you, making them easier to put on and care for. They’re a good choice if you like to keep your hairstyle simple and don’t want to spend much time on it.
HD Lace Frontal Wigs:
HD lace frontal wigs come with a lace that covers more of your head, going from one ear to the other.
This gives you more ways to style your hair. The comprehensive coverage helps make your hairline look very natural as well.
A lace frontal wig is an excellent choice if you like to change how you part your hair often.

HD Lace Wig Installation
Now that we understand the basics, let’s move on to the step-by-step installation process.
Step 1: Customize Your Wig
While HD lace wigs often come pre-tinted, you may want to customize the lace color to match your skin tone perfectly.
Here’s how:
- Use a lace tint spray or apply your foundation to the inner part of the lace using a makeup brush.
- Seal the tint with a freeze-dry spray. Allow the lace to dry completely before proceeding to the next step.
This blends the lace seamlessly with your skin, making the wig virtually undetectable.
Step 2: Pluck the Hairline
For an even more natural look, consider plucking the wig’s hairline:
- Use plucking tweezers to remove individual hairs along the hairline gently. Keep the hair dry during this process to avoid over-plucking.
- Focus on creating a realistic density gradient, mimicking a natural hairline.
Plucking helps make the wig look more like natural hair, which isn’t ideally even all over.
Step 3: Remove Ear Tags
For a flawless fit around the ears:
- Locate the small ear tags on the sides of the wig.
- Using small scissors or shears, carefully remove these tags. This step ensures the human hair wig lies flat against your skin near the ears, enhancing the natural look.
Step 4: Prepare Your Skin and Wig
Proper preparation is crucial to the installation process.
Here’s what to do:
- Clean your face well. Use makeup wipes to remove dirt or oil from your forehead and around your hairline.
- Try on the wig. Put it where you want it to sit on your head. Use your regular face makeup to draw a line where the edge of the wig will be. This helps you remember where to put it.
- If you’ve used the wig before, make it fresh again by spraying some dry shampoo inside the wig to clean it up.
Step 5: Apply Adhesive
To ensure a secure and long-lasting install:
- Put on 2 or 3 thin layers of wig glue where you marked earlier. Wait for each layer to dry clear before adding the next one.
- When all the glue is clear, carefully put the wig on top.
- Use a comb to push the wig’s edge into the glue. Be extra careful around your ears.
Step 6: Secure and Seal
To achieve a flawless melt:
- Apply an elastic band over the wig, focusing on the hairline.
- Leave the band in place for 10 minutes so the lace can fully dry and melt into your skin.
- After removing the band, cut off any excess lace using small scissors or an eyebrow razor.
- Cut in a jagged pattern for a more natural-looking hairline.
Step 7: Style Baby Hairs
Creating realistic baby hairs adds the perfect finishing touch to your installation:
- Use a rat-tail comb to section a small amount of hair along the hairline.
- Cut these hairs to a suitable length — not too short or long.
- Apply edge control product to shape and lay down the baby hairs.
- Use a small brush to style the baby hairs according to your preference.
Step 8: Final Touches
To perfect your install:
- Apply a light mist of lace spray to seal the hairline. Place the elastic band around the perimeter for a few minutes to reinforce the melt.
- Style the rest of your wig as desired. These last steps make sure you secure HD lace wigs.

Fixing Common Problems
Sometimes, things can go wrong when putting on your wig. Here’s how to fix common issues that might come up:
- Visible Lace: If the lace is still noticeable, use a lace tint spray or foundation to match your skin tone better.
- Lifting Edges: Reapply lace glue to any lifting areas and use a small brush to blend the lace into your skin.
- Tangling: Gently detangle your wig using a wide-tooth comb, starting from the ends and working up.
- Frizzy Curly Hair: Use a small amount of anti-frizz serum or oil to smooth flyaways and maintain a sleek look.

From Novice to Pro: Mastering Your HD Lace Wig Journey
Putting on an HD lace wig might initially seem complicated, but don’t worry. You can achieve that flawless, natural-looking result with some practice and patience.
Whether you choose an HD Closure Wig for its simplicity or an HD Lace Frontal Wig for its versatility, these wigs are great for anyone who wants to change their look or cover hair loss.
If you follow this guide and adjust it to fit you, you’ll get better at putting on HD lace wigs and soon feel more confident with your new hair, even install wigs for your friends!
Don't forget to check Glueless HD Lace Wigs!✨
1 comment
This step-by-step guide to installing HD lace wigs is so detailed! I appreciate how it covers everything from customization to styling baby hairs. Definitely helpful for anyone new to wearing wigs. Thanks for sharing!