


1260 Memorial Drive
Atlanta, Georgia 30316
404-458-1330
How to Install a Glueless Wig: Step-by-Step Tutorial
Mikey MoranIn the modernized era of hair fashion, the most accessible and versatile go-to hairstyles include wigs.
At present, human hair glueless wigs have surged in popularity due to their convenient handling. They have shunned the adhesives that have potential health hazards and are equipped with adjustable straps, combs, and elastic bands, thus reducing damage and protecting natural hair.

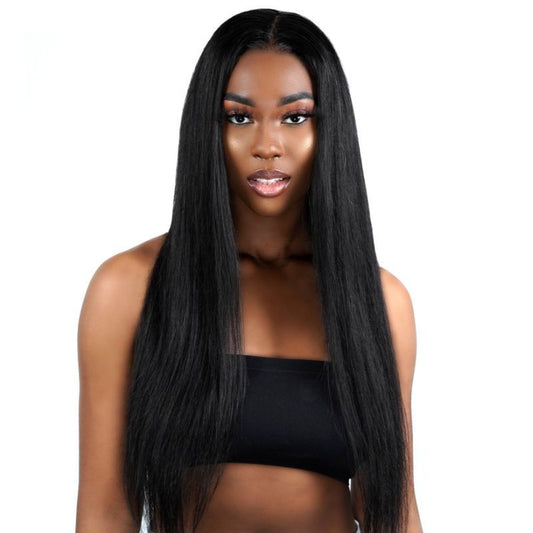
They can be worn and removed easily. Glueless wigs have also become famous as they upgrade the natural look with pre-plucked hairlines and lace fronts like natural hairlines.
They have also prioritized the user’s comfort while providing versatility. Installing a glueless wig requires proper steps, as no glue is involved. Keep on reading to get insight into the glueless installation process.💗💗

Materials Required
Before installing a glueless wig, one has to gather certain materials to help them out. The first and foremost is a good quality glueless wig.
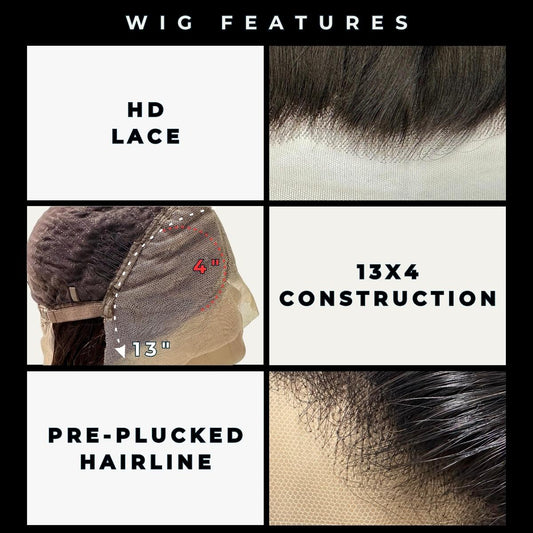
One can opt for a Penelope Glueless HD Closure Wig from Private Label, which have an HD lace closures for a more natural look and seamless blending.
The other essentials include:
- Wig Cap
- Wide-Tooth Comb
- Hair Clips
- Hair Brush
- Edge Control Gel
- Rat-Tail Comb
- Hair Pins
- Scissors
- Mirror
After gathering all these tools, the primary process follows.
Step-by-Step Guide for Glueless Wig Installation:
Step 1: Prepare Your Natural Hair
The preparation begins with washing your hair with a mild shampoo to remove dirt, extra oil, and product buildup, followed by conditioning for a few minutes. I prefer air drying my hair, but a blow dryer with a low heat setting can be used when necessary.
- Try to detangle your hair when it is damp using a wide-tooth comb. Applying a leave-in conditioner will be suitable for smooth hair and protection.
- The long hair is suggested to be braided or put into cornrows to reduce the bulk under the wig.
- A small amount of scalp oil can be used to overcome scalp dryness and irritation.
Now, you can proceed to the next step.
Step 2: Wear a Wig Cap
To set the glueless wig seamlessly, one has to keep the natural hair in place and form a smooth base for the wig.
This can be achieved by pulling a wig cap over your hair to ensure complete coverage of the hair and your natural hairline.
The wig cap also protects hair from rubbing against the wig but does not make it too tight. It can be easily found at the Private Labels store.

Step 3: Secure the Wig Cap
The wig cap must be secured using hairpins to limit its chances of slipping out and remove any wrinkles.
The best points for placing hair pins are around the cap’s perimeter, particularly the neck nape and behind the ears.
- Select lightweight pins and match them with your natural hair for seamless blending.
- After securing the wig cap, gently turn around your hair to check whether it is secured.
Step 4: Prepare the Wig
Now, the foremost step gets its turn, i.e., preparing your glueless wig. It will become easy if one goes for Private Label’s glueless wigs, which have bleached knots and ventilated hair lines.
- First, remove tangling, if any, using a wide-tooth comb, from tips to upwards, with patience to avoid damage. If necessary, trim any excess lace from the front of the wig.
- Be careful not to cut too close to the hairline. Trim the extra lace if present. Ensure the adjustable straps are loosened to their maximum length.
- Place the wig on your head without securing it for test fit.
- Once you are satisfied with your look, you can secure the wig with built-in clips, combs, and straps, which are the specialties of glueless wigs.
Step 5: Adjust the Wig’s Fit
The most beneficial feature of glueless wigs is the adjustable straps at the nape of the neck and sometimes on the sides and combs on the inside.
These straps and combs can be Adjusted to fit the circumference of the wig over your head. This will ensure a secure and comfortable fit.
- Place the wig on your head, aligning the front with your natural hairline.
- Tighten the straps one by one, thus customizing the fit to your head size, and insert built-in combs into natural hair to secure the wig firmly.
- Now, check for your comfort by gently tugging the wig.

Step 6: Blend the Wig with Your Hairline
- Blend the wig with a natural hairline using edge control gel to attain a natural look and enhance realism.
- For this purpose, take a small quantity of gel on a rat-tail comb and gently smooth down the hairs.
- Blend the gel along the entire perimeter of your hairline so that there are no visible gaps between natural hair and the wig, giving more attention to areas where the lace or cap of the wig is most noticeable.
Step 7: Style the Wig
If you are successful in securing the wig, you can choose from a variety of styles.
Gently detangle the hair and part it as you desire. Use a flat iron at a low heat setting for a sleek look and work in small sections.
If you want a voluminous look, opt for Private Label’s Bianca Glueless HD Closure Wig, which can easily be styled.
Always remember to use heat-protectant spray before applying any heat tools. To enhance your look, you can add hairpins, bands, or clips of your choice.

Step 8: Secure the Wig for Extra Hold
If one feels the wig is loosening, they can use hairpins for extra security.
To ensure a long stay, use hairpins along the perimeter of the wig and areas that are highly involved during movements.
Make sure the pins are distributed evenly to avoid discomfort.
Step 9: Final Touches
Final touches include:
- Mirror check for assessing the overall look. Are any adjustments needed to refine the wig’s position?
- Checking the movement comfort while wearing a wig and final touches to your hairstyle.
- Take a moment to appreciate yourself in the mirror. By following all the above steps, one can confidently wear a wig, getting a natural, comfortable, and desired hairstyle.
Regular glueless wig maintenance and attention are required for longevity and the best appearance, providing versatile and stylish hair options for various occasions.

Seamless Glueless Wig Installation
In conclusion, glueless wigs symbolize present-day hair fashion by controlling the hazards of adhesive chemicals.
They offer convenience, versatility, and safety. They feature harmless elements, including straps and combs, for a secure fit without damaging natural hair health.
They increase realism by blending seamlessly with the natural hairline, and their installation method encompasses small and simple steps.
This combination of practicality makes glueless wigs a preferred choice for attaining an easy yet stylish hair solution in today’s dynamic fashion landscape.
Check this glueless wig guide to become an expert on them.🧐😎
1 comment
Thank you for this detailed tutorial on installing glueless wigs! The step-by-step instructions and recommended tools make it seem very achievable. Looking forward to trying it out!