1260 Memorial Drive
Atlanta, Georgia 30316
404-458-1330
How to Customize 7x7 Lace Closures with a Personal Touch
Mikey MoranReady to get into some lace talk? You know I am!
I get anyone who might ditch their lace frontal for the latest 7x7 HD Lace Closures.
They provide generous coverage, great parting, and an unforgettable, stunning look. Compared to the smaller sister 4x4, this baby is HUGE!
In the future I can only expect some crazy hair manufacturer to come out with something bigger, even though I'm not sure if that would be necessary.
For now, let's get into this seven inch square lace.
If you just bought your 7x7 Closure, and it better have been from Private Label, you might think about what is next. Good question.
Wonders will happen right now.
Keep this blog close, your hair clean, and your heart open for these customization tips and ideas.
Get your dress to the dry cleaner because you're going to look gorgeous this night!

7x7 Closure Customization
Customization refers to all the necessary tweaks one must make to achieve a natural-looking hairstyle.
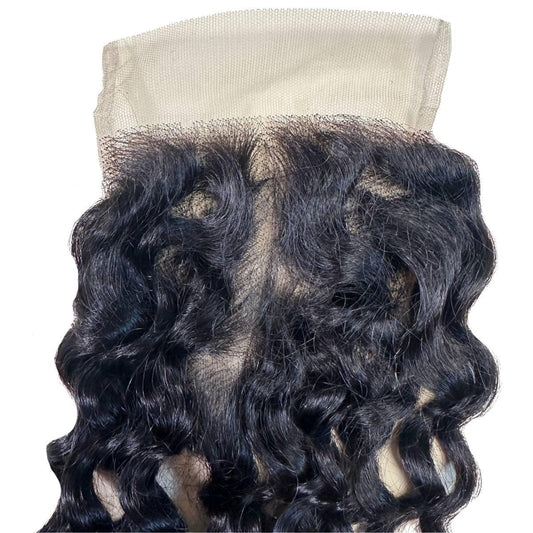
It allows us to set the closure according to our styling needs, helping us achieve a more seamless appearance. A must would be bleaching the knots. Despite the closure having a pre-plucked hairline you might even want to do some tweezing.
Pro Tip: What's a pre-plucked hairline? This refers to a lower density of hair in the front portion of the closure that adheres to your forehead to give a more natural appearance.
The customization process to style 7x7 closure may be time-consuming but straightforward.
You didn't just throw down some coins on a closure to make it average, right?
Choosing the Right Lace Closure
Before customization, one must select a good 7x7 closure.
Buying a closure is easy if you go to a reputable extension source like Private Label Extensions. Yeah, that's us!
The factors to be considered while choosing a 7*7 closure are as follows:
Closure Lace Type
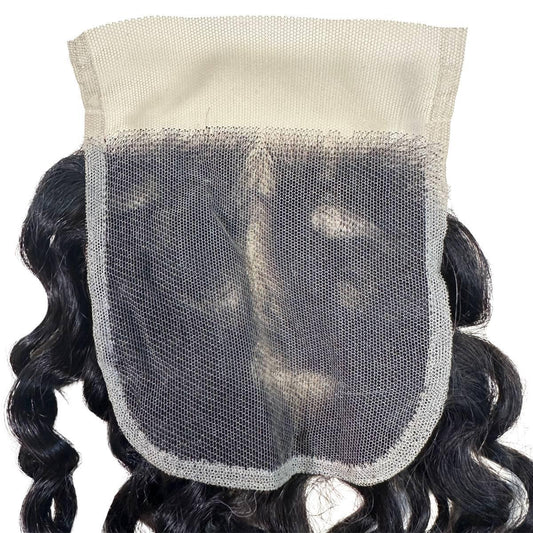
7x7 closures are mainly available in Transparent or HD lace. Transparent lace is known for its durability, while HD lace closure is thin and transparent, helping to blend seamlessly with the scalp.
At Private Label we only sell the HD version of this size. Yeah, it's the best!
Hair Texture
Match the texture and type of closure hair with your natural hair. You can also match them with those of hair bundles.
So if you get a body wave bundle deal make sure you match it up with a 7x7 Body Wave closure.
Closure Density
The density of closures is pretty much standard.
It's not like a wig where you have to make a decision on how thick you want it. The goal with a closure is to look natural.

Preparing the Closure for Install
Okay, we are getting close to installing this massive lace. And yes, it's going to look good!
To get ready for the install please follow these steps for best results:
Bleaching the Knots
Bleaching will lighten the knots color, thus blending it with the scalp.
The "knots" are created when a hair technician is tying the strands of hair within the holes of the lace. The goal is to have smaller knots in the front as they are easier to hide. Once you bleach the knots they usually disappear.
Apply the bleaching mixture over the knots. Wait for 20 - 30 minutes before rinsing and shampooing. The time it takes to bleach the knots depends on the Volume Developer you use. Now if I see you using a 40 Volume Developer I am going to slap myself. Pah-lease use 20 - 30 Volume and take your time!
When we bleach knots for our wigs at Private Label we use 20 Volume and let it sit for much longer. This way will not harm the integrity of the knots.
Bleaching is necessary as the knots are usually darker and easily visible, disrupting the natural look of closure. Now that we have this taken care of let's keep moving on.
Toning the Lace
Toning the lace closure helps to adjust the lace hue, thus balancing any color contrast. This makes the lace flawless in finishing, therefore boosting confidence. Toning is often not necessary when using HD lace so this one is optional.
HD Lace is generally more expensive but you can make up time because there is less manipulation that needs to happen. And time is money at Private Label!
Tinting the Lace
Tinting the lace matches its color with the skin's complexion.
You can use our lace tint spray, which is available in various shades.
Choose the shade that matches your skin tone. Apply it and let it dry. One can also opt for DIY lace tint, a water and fabric dye mixture. Soak the lace in dye. Rinse it and let it dry.
Not sure which color of lace tint? Stop by a Private Label hair store and we can do a demonstration for you!
Customizing the Hairline
Before we get started with talking about customizing the hairline I need to share one tip. Don't over-pluck your hairline!
If you tweeze too much there is no going back. Yes, we know you have seen the videos on TikTok with the hairstylist plucking so fast you can barely see their hands moving but that is not always the best way to customize.
Also, take your time because we have seen cases where the tweezers have cut the lace because someone plucked a little too low to the hairline.
The human hair in 7 by 7 closure usually has a higher density than the natural hairline, thus calling for customization. It's not higher in a bad way but the hairline is almost "too perfect" and goes straight across. This is the part that is not as natural compared to the actual density.
Plucking the Hairline
Pluck the hair from the closure using tweezers to match the densities of both hairlines. Make sure to tweeze in "V's" and "W's" for a more natural final appearance.
Remember that a perfect hairline is not one that goes straight across.
Carefully pluck to establish a gradual density transition between the closure and natural hairline. You should only be plucking the front of the hairline and if you want to create a more dramatic middle or side part.
No plucking necessary in the back!
Creating Baby Hairs
Yeah, I know. Not everyone loves baby hairs.
Personally, I think they look great but they might not be for you. If not, don't create this style and keep on moving.
You can create baby hairs by bringing portions of the front hairline down and using edge control and an edge brush to style.
I said I like baby hairs but I didn't say you need them all over your forehead thinking you are a baby hair Picasso. Less is more in the baby hair department!

Installing the Lace Closure
Let's get ready for the install. Are you excited?
Our goal is to have the most realistic look possible. If you followed the steps above you are on your way.
Of course, we always recommend using a licensed hairstylist for installing a closure. You could be the DIY type and that's cool too.
Remember to have your natural hair thoroughly washed and your scalp cared for before installing a closure.
Let's do this!
Prep Your Natural Hair
Create a flat base for closure by braiding the natural hair into cornrows.
The smaller the better! This is where having an amazing hair braider is always a plus. Maybe you are a pro and can do this step yourself which is amazing.
Secure your braids properly. This helps in creating a smooth and seamless base for the closure. Cover your hair with a wig cap.
Quick Tip: Private Label has the new HD Wig Caps and our clients are loving them!
Wig cap not only covers your hair but also protects it.
Securing the Closure
Place the closure on the scalp and adjust its position.
Since this is a 7x7 you will want to keep it centered on the head as you have plenty of room for side parts on either side.
Using a curved needle and thread you will sew the closure into the braids. This will keep the sides and back portion secure.
Securing the front portion with your scalp is going to be the key part for a natural appearance. You can do so with adhesive, such as lace glue or lace tape.
If you are using the 7x7 closure on a glueless wig you might be able to get away with not using an adhesive as long as the closure has real HD lace. This is one of the main reasons why glueless wigs have become so popular recently.
If you are going to use an adhesive, perform patch tests. This process is when you put a little bit of the adhesive on another part of your body to see if you have any reaction. Because obviously you don't want to have a rash or other issue on your forehead!
This step will help identify the potential dangers of adhesives. You never know!
Now that your closure is installed we need to get this girl styled!
Styling the 7x7 Lace Closure
The reason you probably bought a 7x7 closure is because they are known for their styling and parting versatility.
If you bought a closure that matches your bundles you might not need to do too much styling. Sweet!
But if you want to take your hairstyle to the next level please proceed.
Cutting and Trimming
Cut the extra lace from the closure but leave a small margin for blending with the skin. This is a must!
If you are going for the glueless option you will want to cut the lace in waves. Check out the closeup photos of our glueless wigs as an example.
Closure hair can be trimmed to the desired length and style to match your bundles. You want to make sure that the closure hair is blending well with the bundles hair.
Pro Tip: Don't skimp on the closure length if you are going for a longer hairstyle. Trust me, it's not going to work out well and the shorter hairs of the closure will not match.
Curling or Straightening
7x7 closures allow for both curling and straightening.
Maybe you have a loose wave hairstyle and want to have a straight and sleek look for a night out. The hair can be straightened simply using a straightener, thus giving a more polished look.
Please start with lower heat temperatures when straightening the hair! High heat may be needed for curlier textures like Kinky Curly and Jerry Curl.
For some big curl volume you can curl the hair using a curling iron. Always use a heat protectant spray to protect the hair from heat. Don't go burning up that hair and try and blame the supplier!
Things are looking good at this point!
Coloring Your Closure
Closures allow for coloring as they usually are made from natural human hair.
The problems start happening when you have a synthetic mix or some other type of hair was mixed into the raw materials before the ventilation process.
This is a way hair manufactures try and save pennies to ruin a $100+ product. We don't play these games at Private Label!
Closure hair can be colored using a professional hair color product and a professional hairstylist. You have to be SO CAREFUL that you do not color the lace of the closure.
Remember that virgin hair will color up to a honey blonde at it's best. You will need a raw hair closure if you want to go really crazy with color and get those lighter blonde or platinum shades.

Maintaining Your Lace Closure
Don't invest in all this lace if you are not going to properly care of it.
Proper 7x7 closures maintenance extends the life of your closure by adding a significant amount of time. We are talking multiple installs, looking great all the time, and being able to continue styling the hair.
Doesn't that sound great? Well, let's get into the maintenance!
Washing Your Closure
Wash the closure at 1-2 weeks intervals with sulfate-free shampoo. Handle the hair gently to avoid hair damage and shedding.
Don't scrub to hard close to the knots as this could cause excessive shedding. Please remember that HD lace is delicate and needs to be treated with extreme care.
Conditioning The Hair
Condition the hair after washing to retain moisture in the hair follicles. Don't use a cheap CVS brand conditioner on your hair.
It's best to find a conditioner made specifically for hair extensions.
Similar to the shampoo process, be gentle with the lace especially in the area where the knots are tied to the lace.
Moisturizing Your Hair
Apply a leave-in conditioner and lightweight natural oils to keep hair frizz-free.
Moisturizing also helps maintain hair texture. If you have a closure with curls then find a great curl cream. A little bit of these products can go a long way so they are a good investment.
Storing Your Closure
When not in use, properly store the closure in a silky bag or even wrap in a bonnet.
This is necessary to retain its shape and prevent tangling for your next install.
If you can keep your closure stored in a place where it will not have items placed on top it would be great. The last thing you want to do is to get the hair tangled right before you are ready to install it again.
Common Issues in Customization
As amazing as a seven by seven closure can seem we can still have issues if you don't follow the Private Label closure protocol!
If you follow the steps above there will be less of a chance that you will have the problems below.
Shedding
Closures are prone to shedding when used regularly. Remember, all hair sheds.
The key is to reduce the amount of shedding over time so you can wear the closure for multiple installs and get your money's worth.
To overcome this, keep the hairline manageable (Don't over-pluck!). Be gentle when combing and washing (Wide tooth comb). Avoid excess heat application near the hair base (You better not touch that lace with your flat iron!).
Tangling
Regularly detangle the hair with a wide-tooth comb. Tangling damages the hair texture and causes shedding.
Expect curlier textures to have more tangles. Just because you are wearing hair extensions doesn't mean they won't tangle! Especially curly hair.
Lifting Hairline
With usage, the lace may start lifting in the hairline area. Reapply the adhesive to settle it down.
You can sew down the loose sections in the back if you feel the closure slipping around a little bit. The hairline is usually where we see the lifting issues.

Personalizing Your 7*7 Lace Closure
We have covered all the important aspects of your closure purchase. Leave us a comment below if you have any questions or please reach out to the Private Label hair team with any additional questions.
You know now that customizing a 7x7 lace closure involves various steps, from choosing the appropriate closure to final styling and maintenance.
By customizing your 7x7 closure, you can have a seamless, natural-looking hairstyle that is going to make you look good and feel good.
Remember that the secret to becoming skilled at customizing lace closures is patience and repetition.
Enjoy the beauty and adaptability of all 7x7 lace closure types!


