


1260 Memorial Drive
Atlanta, Georgia 30316
404-458-1330
How to Install 13x6 HD Lace Frontals for a Seamless Look
Mikey MoranSo, now that you’ve got your hands on one of our impeccable 13x6 HD lace frontals let’s dive into creating a seamless, natural, and flawless look!
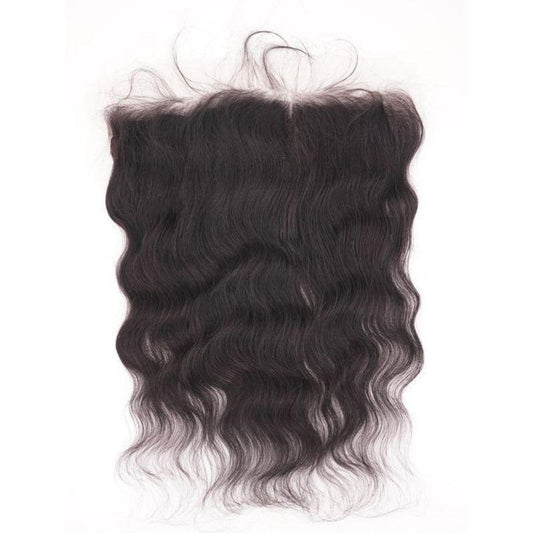
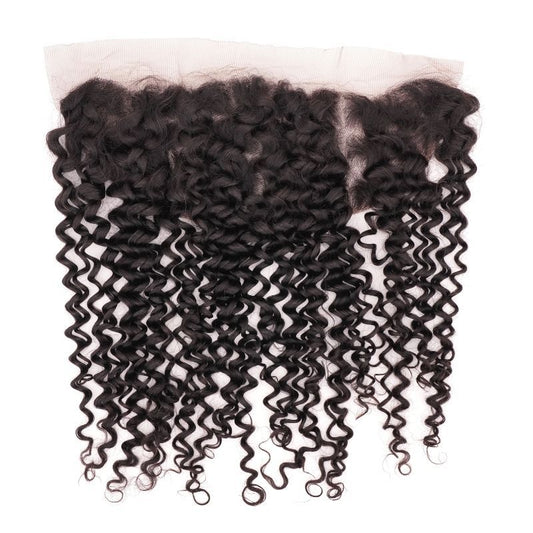
Wearing a frontal like the 13x6 HD lace Frontal is the ultimate way to get a natural look. The larger-sized frontal allows for more options for installing and styling compared to its smaller 13x4 counterpart.
The best part is that installing this frontal is actually quite easy if you follow our steps.
You can easily do this yourself at home, but if you still think you need the professional help of a hairstylist, go for it!
Now that you have your frontal remember your matching virgin hair bundles before starting. You will need two bundles for shorter hairstyles between 10” and 14”, three bundles for 16” - 24”, and four bundles for anything 26” and up. You can add additional tracks depending on how full of a hairstyle or wig you are trying to create.
Keep reading for a step-by-step tutorial on installing a 13x6 HD lace frontal with your next sew-in.

Step 1 - Prep Your Natural Hair
Your goal is to have clean hair, a healthy scalp, and the lace frontal to lay flat.
This will give you the best overall experience. Start by prepping your natural hair by washing and conditioning it. Detangle it properly and lay it flat by braiding it or wearing a Wig Cap over it to ensure a smooth base.
Consider using a Hair Growth Serum to moisturize your scalp before applying your hair extensions.
Step 2 (optional) - Lace Tint
You can use foundation, concealer, or Lace Tint on the front part of the lace and the parting to match your skin tone more.
The key is for the frontal to match your skin tone and look natural. We also recommend bleaching the knots so you don’t have little dots on your forehead.
Our HD Lace Frontals have small knots, but it’s best to take this extra step to get the best results.
Step 3 - Placing the Frontal
Place your 13x6 HD lace frontal on top and adjust the front of your place to match your natural hairline.
You can use wig clips to secure the back and sides of the lace frontal.
The frontal will go ear to ear and may require adjustments based on your hairline and head size.

Step 4 - Melting Spray
Once the wig is secured, you can apply a melting spray or a lace glue adhesive to the front part of the lace frontal to hold it firmly and blend seamlessly with your skin.
Use a melting band to hold the frontal in place while the adhesive dries.
This will achieve a natural look by making the lace look undetectable.
Step 5 - Cutting the Lace
Next, cut the extra lace at the front from ear to ear, leaving about a ¼ inch or so behind.
To get a natural and seamless hairline, keep spraying and patting it down with a melting spray like Got2Be.
Step 6 - Keep the Lace Down
We all love a snatched look!
To achieve this, get a scarf, melt belt, or anything else that can help compress the front part of the lace frontal down to fix it in place, get a tighter fit, and achieve a more seamless and realistic look.
The goal is to ensure the lace has completely adhered to your skin. The last thing you want is that lace to start popping up in the wind! We don’t need you as the next meme on Instagram, okay?
Ladies, this is totally optional! If you do not like a snatched look, you do you!

Step 7 - Hair Parting
Use a rat tail comb to create a parting of your choice, such as the middle part of a deep side part.
You can also use tweezers to pluck a small amount of hair to create a more dramatic part.
The key is not to overdo it, as then your frontal could be ruined.
Step 8 - Flatten Baby Hair
Use an edge brush with hair spray, edge control, or wax to gently smooth out and flatten baby hair and keep it in place for a natural finish.
If baby hairs are not for you, gently brush them back into your bangs. We know most women have a love/hate relationship with baby hair.
Let us know in the comments what you like!
Step 9 - Heat Protectant Spray
If you want to use heat tools, don’t forget to use a Heat Protectant Spray.
Even though Private Label’s 13x6 HD lace frontals are made of high-quality 100% human hair, they still need to be protected and cared for to ensure longevity.
Keep the temperature low, and don’t rush the styling process.
Step 10 - Styling
We are almost done!
Unleash your creativity by creating different hairstyles with whatever part you want. These 13x6 HD frontals are very versatile and easy to style.
If you want a straight and sleek look with a deep middle part like Kim Kardashian, that can be easily achieved, but if you want to experiment with curls and waves, you can do so easily using your flat or curling iron.

Step 11 - Accessorize
Oomph up your hairstyle using accessories like headbands, clips, scarves, and other accessories to give your hair more personality and make it even more fun!
Remember to not let anything puncture the lace of the frontal.
Professional Frontal Install Tips
Practice, practice, and more practice
You probably won’t get a perfect finish on your first installation, but do not be discouraged by this.
Keep practicing. Remember, ladies, practice makes perfect.
So, keep practicing, and you will be a pro at installing your 13x6 lace frontals in no time at all!
Go slow and simple
Don’t opt for a complicated hairstyle right off the bat.
If you are a beginner, try out easier hairstyles initially, like the straight and sleek look with a middle or side part.
Be Gentle with the Frontal
Be gentle with your lace frontals when styling and brushing them to prevent hair breakage and damage.
Avoid pulling or tugging on the hair.
Properly Maintain your Frontal
To ensure the long life of your 13x6 lace frontal, you must care for it well and maintain it by cleansing and washing it regularly.
Use a good conditioner to hydrate the hair.
Detangle with a wide tooth comb only when the hair is dry and never when it is wet to avoid pulling and breakage.
We have a lace frontal blog with all sorts of additional tips and tricks to make sure you are an expert in no time!

Bonus: Removing Your Frontal
You didn’t think we would tell you how to get that frontal on and not take it off?
You can do this at home as long as you have the best two products.
First, to safely remove your frontal, use our Safe Lace Glue Remover. This will help dissolve the lace glue and make it easy to get the lace off your skin.
Never quickly pull the lace frontal off your head, even if it’s starting to appear in the front.
There could be sections that still securely adhere to your skin.
Lastly, we know that an HD lace frontal is an investment. You need to get more than one use out of it. We recommend using a Safe Citrus Lace Cleaner to properly remove glue buildup so you can easily reapply the frontal for a second, third, or even fourth install.
It really depends on how gentle you are with the frontal to get the most out of it.
Is a 13x6 Frontal for You?
The 13x6 HD lace frontals, and lace frontals in general, have revolutionized the world of hair extensions and lace front wigs.
They also offer a protective hairstyle to save your natural hair from heat and environmental damage.
The best part?
You will achieve the most natural-looking hairline that blends seamlessly with your natural hairline and skin tone. The 13x6 HD lace frontal also allows versatility in styling, a comfortable and breathable wearing experience, and a secure fit.
Follow this step-by-step guide to properly install your lace frontal so that it stays put throughout the day.
Moreover, taking good care of and maintaining the lace frontal will help ensure a longer life span and provide long-lasting wear.
When you shop your 13x6 HD lace frontals with Private Label, you will get high-quality, 100% human hair that is durable, long-lasting, and well worth the price!
Do you have any tips about installing a lace frontal we should add? Please let us know in the comments below!
2 comments
Great tutorial! I have a question: Are there any specific tips for ensuring the 13×6 HD lace frontal stays in place for those who are particularly active or sweat a lot?
Great tips for installing a 13×6 HD lace frontal! Thanks for this detailed guide – it’s super helpful for both beginners and pros. Can’t wait to try these steps for a flawless look! 🌟